
Spring공부 01 Spring입문
1. 스프링 개발 환경 세팅
스프링 개발 환경은 보통 자바를 이용하기 때문에 이클립스 아니면 인텔리제이를 쓴다.
본인은 자바 공부 시에도 인텔리제이를 썼기 때문에 인텔리제이를 쓸 예정이다.
https://start.spring.io 사이트에 접속해서 스프링 부트 기반 프로젝트를 만들어 압축파일을 받고 압축을 풀어준다.
다음으론 인텔리제이에서 해당 폴더를 열어준다.
HelloSpringApplication.java 를 실행시키면

이런 화면이 뜨는데
이제 웹 브라우저에서 localhost:8080 을 접속했을때

이러한 오류 화면이 뜬다면 성공이다.
여기서 오류 화면 뜨는 것이 성공인 이유는
아직 아무것도 작성한것이 없기 때문에
오류 화면이 뜨는것이 당연한 것이라고 한다.
따라서 여기까지 하면 스프링 개발 환경설정이 끝난다.
처음엔 인텔리제이로 스프링 프로젝트를 열었을 때 오류가 나서 당황했지만
구글링을 통해서 임시방편 느낌으로 해결했으므로
제발 추후 같은 오류가 생기지 않았으면 좋겠다..
2. View 환경설정
2.1 Welcome Page 만들기
welcome page 란 스프링 부트를 실행했을 때 기본적으로 초기에 표시되는 페이지다.
보통 static/index.html 로 접근할 수 있다.
간단한 html 코드를 작성하여 welcome page 를 만들어 보았다.
<!DOCTYPE>
<html>
<head>
    <title>Hello</title>
    <meta http-equiv="Content-Type" content="text/html; charset=UTF-8" />
</head>
<body>
Hello
<a href="/hello">hello</a>
</body>
</html>
이 코드를 static/index.html 에 넣어 주면
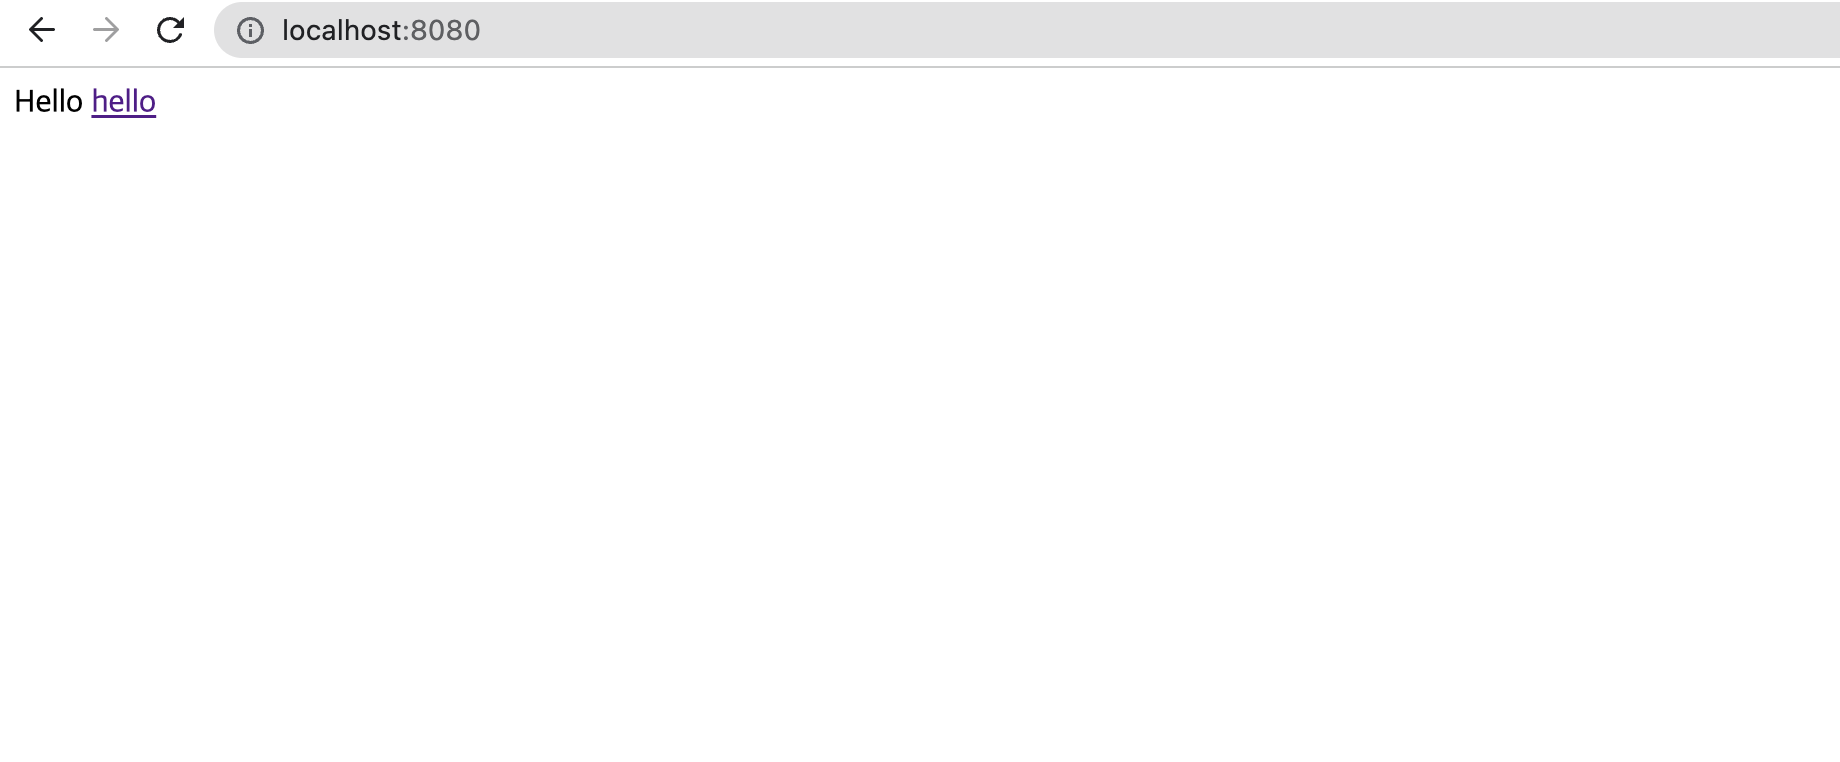
이런식으로 에러 화면이 더 이상 뜨지 않게 된다.
2.2 Thymeleaf 템플릿 엔진 작동 테스트
웹 애플리케이션에서 첫번째 진입점이 컨트롤러이기 때문에 컨트롤러를 만들어줘야 한다.
우선 hello.hellospring 아래에 controller 라는 이름의 패키지를 만들어주고 HelloController 클래스를 만들어준다.
코드는 아래와 같다.
// hello.hellospring/controller/HelloController
package hello.hellospring.controller;

import org.springframework.stereotype.Controller;
import org.springframework.ui.Model;
import org.springframework.web.bind.annotation.GetMapping;
import org.springframework.web.bind.annotation.RequestParam;
import org.springframework.web.bind.annotation.ResponseBody;

@Controller
public class HelloController {

    @GetMapping("hello")
    public String hello(Model model) {
        model.addAttribute("data", "hello!!");
        return "hello";
    }
}
여기서 model 이란 MVC 의 model view controller 에서 model 이다.
다음으론 template 폴더 아래에 hello.html 파일을 만들어준다.
코드는 아래와 같다.
<!-- template/hello.html -->
<!DOCTYPE HTML>
<html xmlns:th="https://www.thymeleaf.org">
<head>
    <title>Hello</title>
    <meta http-equiv="Content-Type" content="text/html; charset=UTF-8" />
</head>
<body>
<p th:text="'안녕하세요. ' + ${data}" >안녕하세요. 손님</p>
</body>
</html>
이제 thymeleaf 템플릿 엔진이 잘 작동하는지 localhost:8080/hello 에 접속하여 확인해본다.

이러한 화면이 뜬다면 성공이다.
Thymeleaf 템플릿 엔진 작동 원리 정리
- 웹브라우저에서 localhost:8080/hello 이란 페이지를 던지면 스프링부트는 tomcat이라는 웹서버를 내장하고 있는데 이 서버가 이걸 받아서 /hello 를
@GetMapping으로 받은 컨트롤러를 실행시킨다. - 그러면
HelloController가 실행되고model.addAttribute("data", "hello!!")코드에 의해서 model 에는data:hello!!가 들어간다. - 그리고 “hello” 가 반환되는데 여기서 “hello” 는
resources/templates폴더에서hello라는 이름의 파일을 찾아서 실행시킨다는 뜻이다. 따라서viewResolver가hello.html을 찾아서 Thymeleaf 템플릿 엔진처리를 해준다.
댓글남기기